Easy Silhouette Project Idea: Paper Candy Flower Lollipop
Easy Silhouette Project Idea: Paper Candy Flower Lollipop
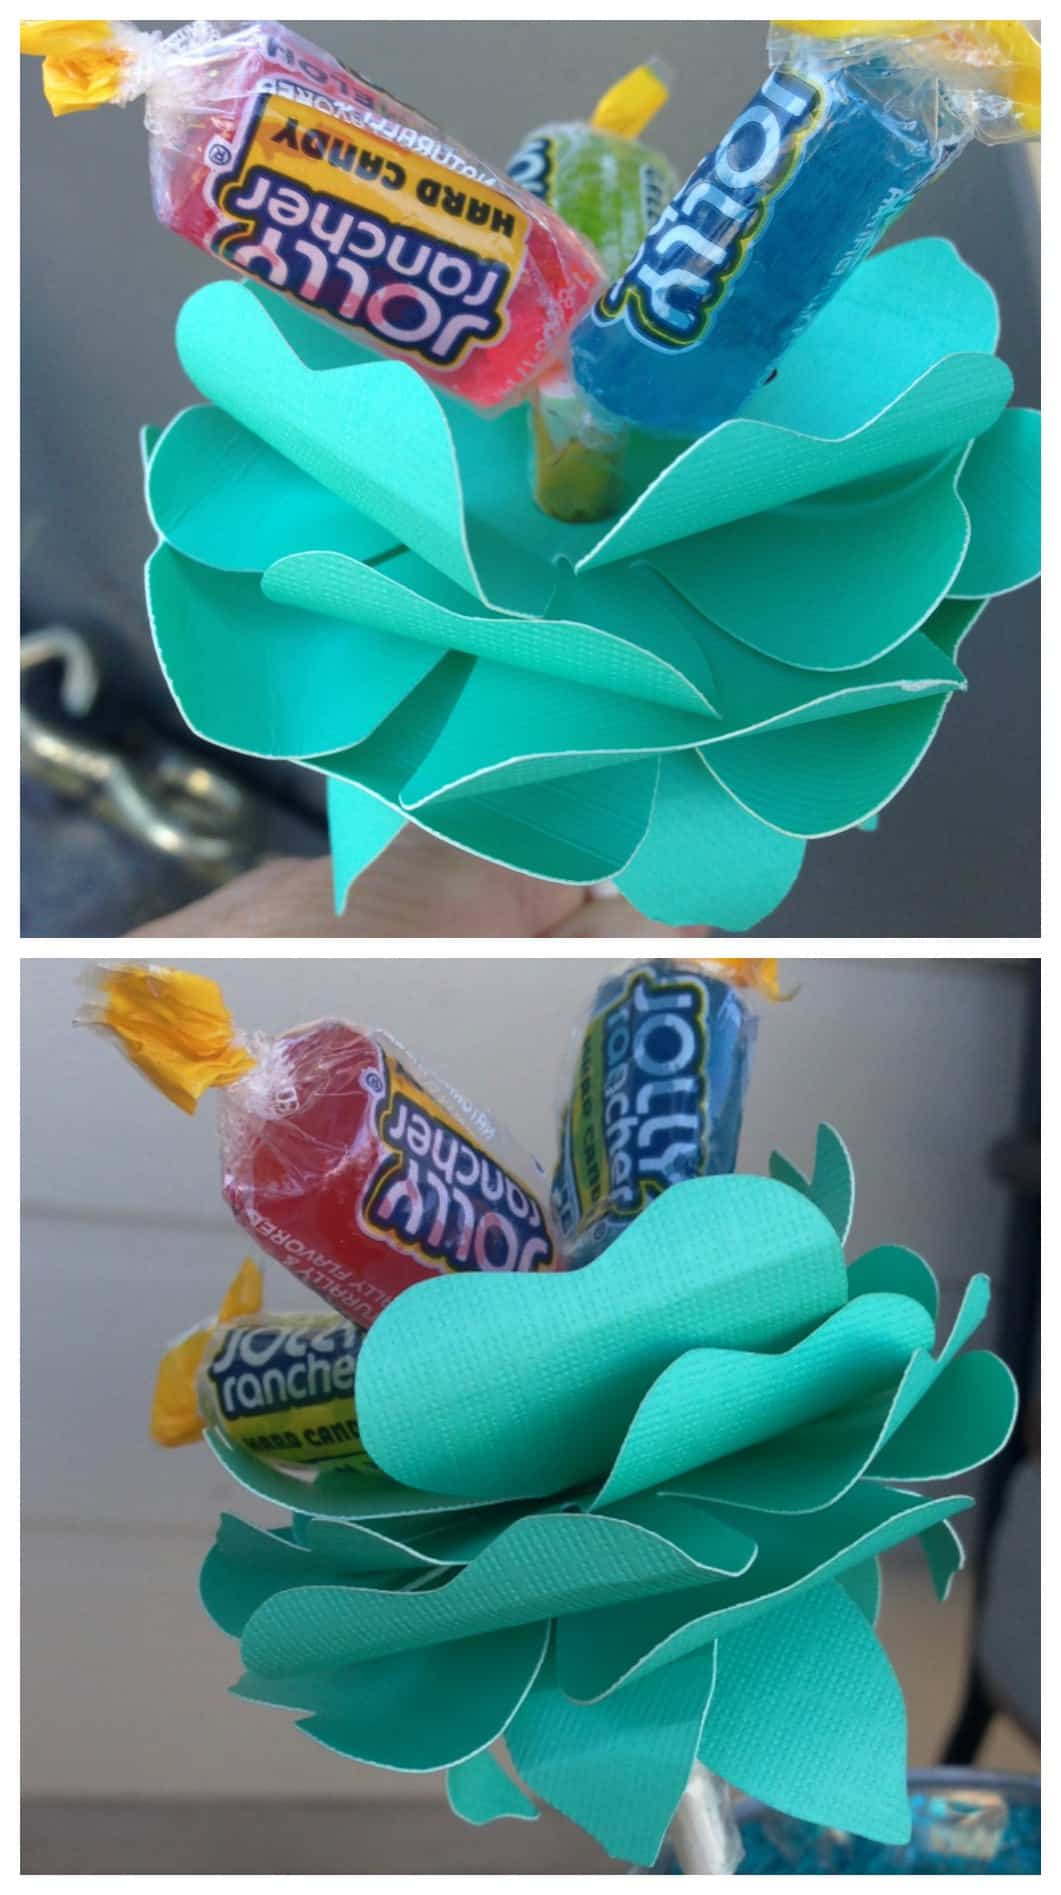
I have to start off by telling you that I have never tried any type of cutting machine before. The Silhouette Portrait machine use was my very first experience. I am hooked. I love it. I can’t believe how easy it was to pull out of the box and use. I made this super cute easy Silhouette Project Idea called the Paper Candy Flower Lollipop. I was going to use Hershey’s kisses for the flower bud but I didn’t have any on hand. I did have Jolly Ranchers left over from our Jolly Rancher Candied Apples project we did last week.
Before I start with this project I did a ton of research on supplies. The supplies are going to be the most expensive part of owning this machine. I highly encourage you to join some facebook groups with other crafters who enjoy the Silhouette because the knowledge you gain from these online groups is extremely valuable to newbies like myself. The very first tip I learned from almost everyone in these groups was the best place to buy vinyl. Vinyl and cardstock is probably the most popular supplies used. Cardstock can be found almost everywhere but the vinyl is a bit tougher to find. Well, the good stuff is anyway. There are cheap vinyls that don’t last and good vinyls that will. I was told Vinyl Expressions is definitely the place to buy the good stuff. Don’t buy the vinyls at Hobby Lobby or Micheal’s. You won’t be happy at all.
![]()
I opened the box and inserted the Silhouette Studio software. I’m not one for reading directions and I can be rather impatient so I just started poking around the software. There is a rather large instruction booklet if you need it though. I quickly found my way to the Silhouette Online shop and found tons and tons of downloads. This machine comes with a $10 credit to get you started. There are also 50 free designs in your library right when you start plus there’s a free download every week.
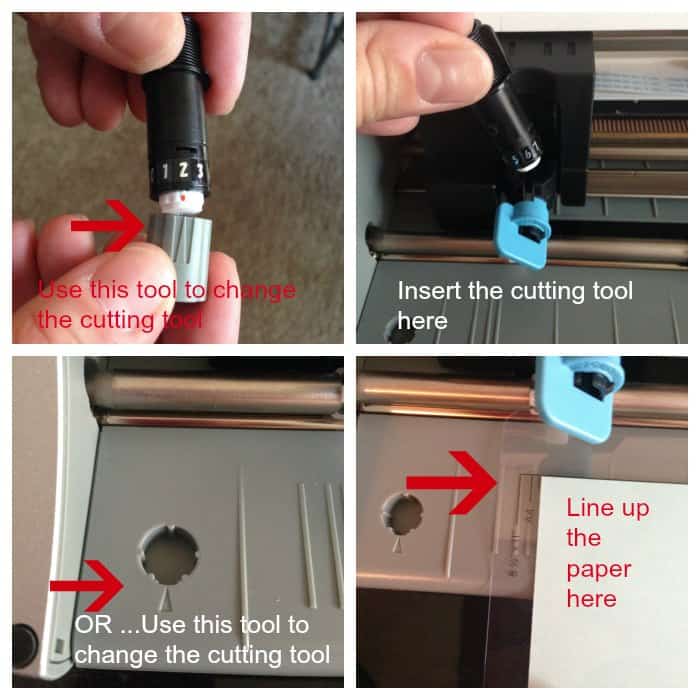
The Silhouette is a very simple machine to operate. Basically there’s a few buttons to load the cutting mat and eject it and there’s a cutting needle to insert. The most complex thing about this machine is setting the cutting needle to the desired firmness which depends on your project. Luckily for me, this machine tells me exactly what to set it to without any guess work. See, I told you. It really is pretty easy.
There are tons of projects you can make. There’s a print and cut feature where you can print something on your printer and cut it with your Silhouette. You can cut card stock paper which is what I did with the project. You can use scribbles and draw. You can cut vinyl. You can even cut sticker paper or even tattoo paper. I bet there’s more that you can do but I’m a beginner and don’t know them all yet.
I immediate found the 3D Sucker and Pencil Flower template which was 99¢ I believe. There were templates that started at 50¢ and the prices went up to $2.99 but most were only 99¢. That $10 credit you get in the kit will go a long way.
I loaded my template into the Studio and grabbed the paper I wanted to cut. I ended up using a textured card stock just like this one here on Amazon. There are tons of ways to get card stock on sale. Hobby Lobby has a coupon on their website every week that gives you 40% off any regular purchased item. Micheal’s craft store also has a coupon every week too. The Silhouette online store has some really good started kits too. I tend to shop around to find the best deal. This machine is going to get super fun around the holidays too! I can’t wait to create all my own handmade Christmas cards. They even have pop up templates that are super detailed.
The paper that you find in the stores is typically 12 x 12 so I did have to trim my paper down a bit because the Portrait machine can only handle the 8.5 x 11 size. I heard the Cameo machine can handle the 12 x 12 though.
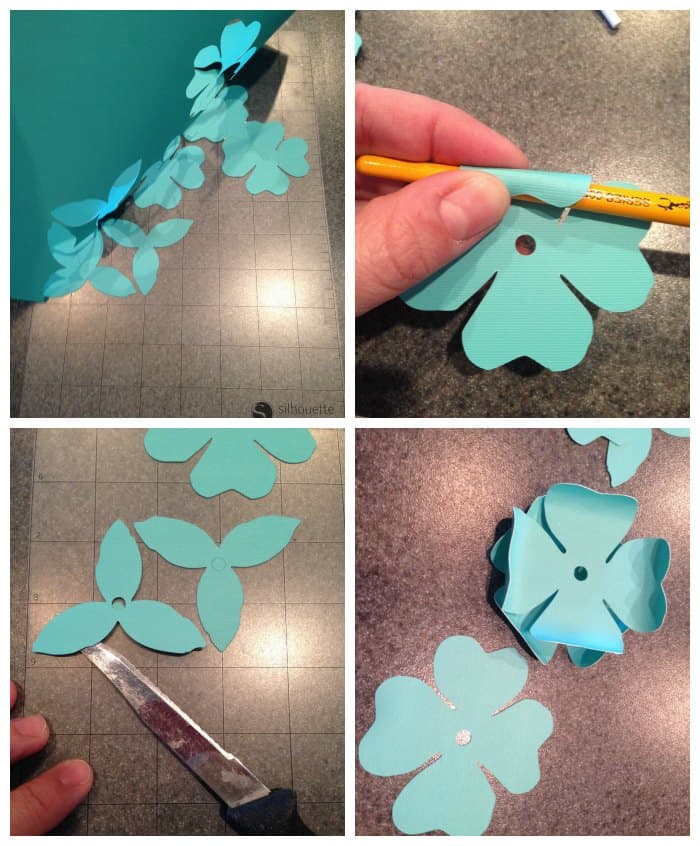
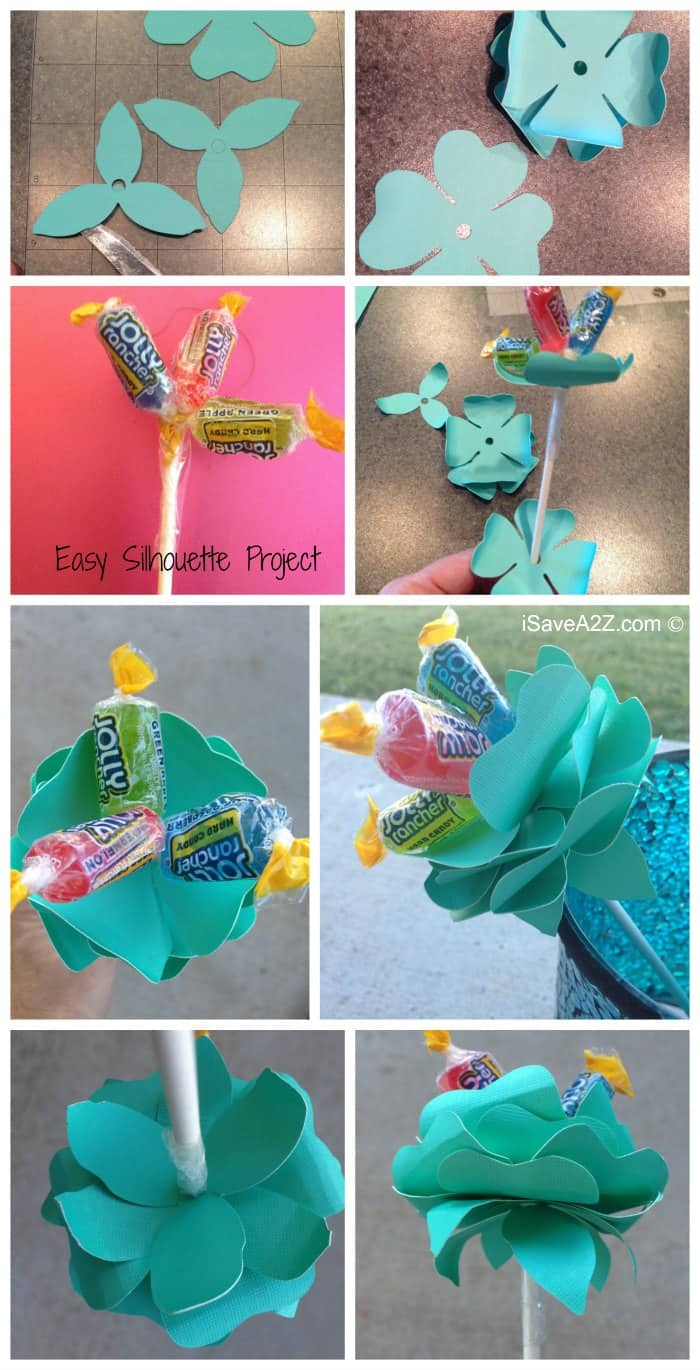
I loaded my 3D template on my page. I simple selected the design and double clicked to have it load directly in the Silhouette Design studio. There is a small box in the corner of the highlighted design. When you click this box you can drag it bigger or smaller to fit your page without messing up the design. I then peeled the protective paper off of the cutting mat and stuck my trimmed textured card stock on the mat. I centered the paper in the feed and hit the cut button on my machine. It brought up setting that will tell you what size to set the cutting tool at. It will do this after you choose the paper type you are using. Changing the needle is really easy too. There’s a notch built into the inside of the Portrait machine that will allow you to insert the cutting tool and turn the knob to change the cut setting. Easy, peasy!
After we inserted out paper and began cutting it, it only took less than a minute to complete. We then peeled the paper off of the sticky mat and started our project. I used tape to stick the three Jolly Ranchers at the end of the lollipop stick. You can use the 6″ lollipop sticks or the 12″ lollipop sticks. The paper cut outs fit nice and snug on the lollipop stick so I didn’t even have to secure it with tape when I was done adding all of the pieces of the flower.
Before adding the flower peddles, I used a paint brush stick to curl the ends of the peddles. I curled the peddles inward and the leaves I curled in the opposite direction (outwards). I added all the peddles first and then the two leaves to finish the project. The double sided textured card stock paper with a lighter color on one side and a darker color on the other side would be perfect for this project because you could alternate the sides of the flower too.
Here are a few process photos. Feel free to Pin It on Pinterest too.

UPDATE:
I’ve been so busy creating all sorts of projects with my new vinyl cutting machine! I just can’t believe how much fun this is to use. It’s easy too!
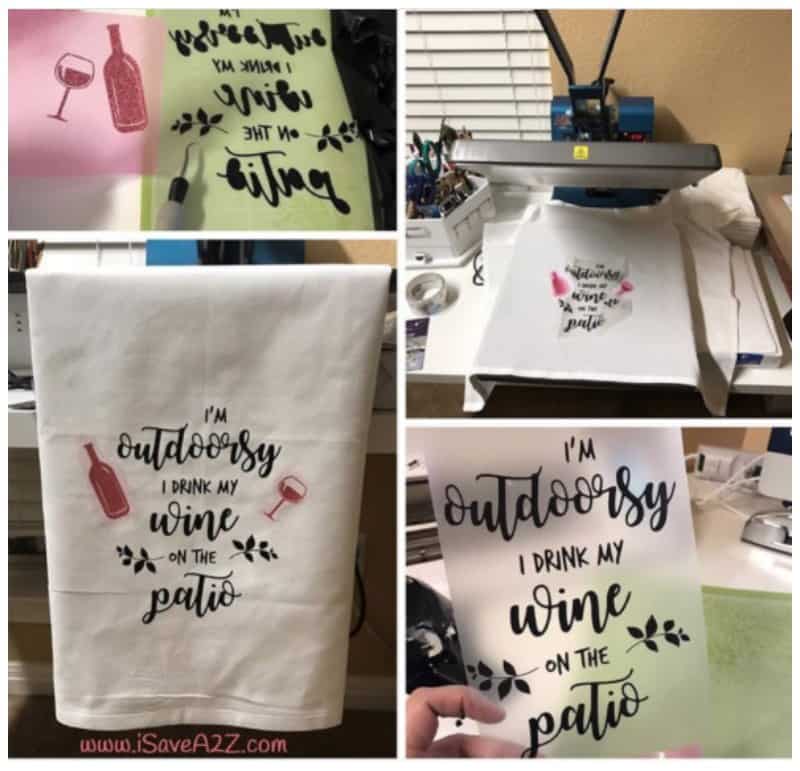
I am in love with my new heat press. I have a 15×15 size heat press I bought on Amazon just like these. I must prefer this type than the swing away kind. I just don’t have the space for the swing types.
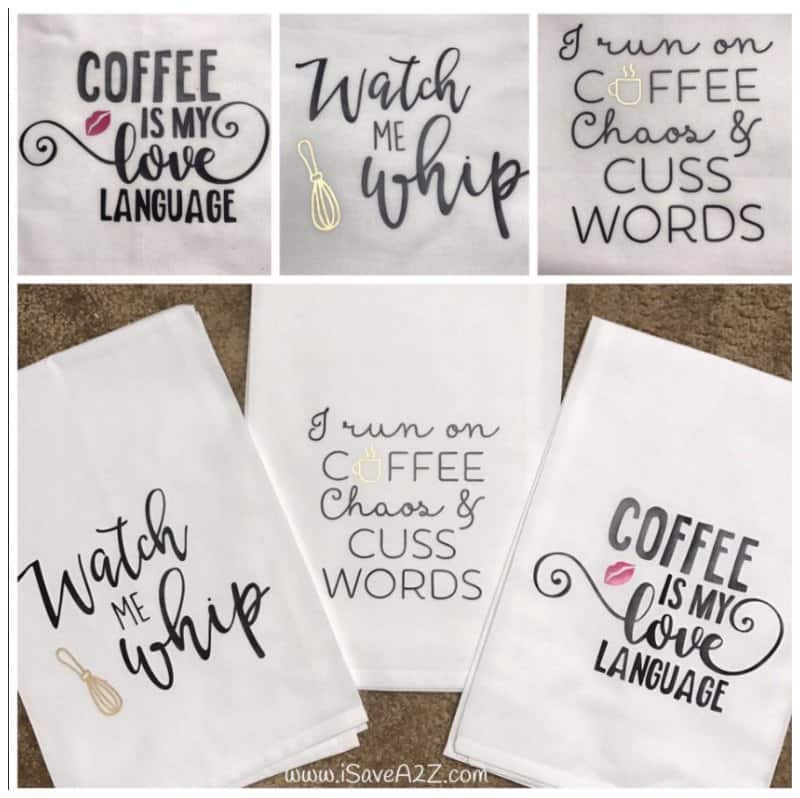
Here are a few tea towels I customized with my favorite sayings and a tshirt for my youngest!
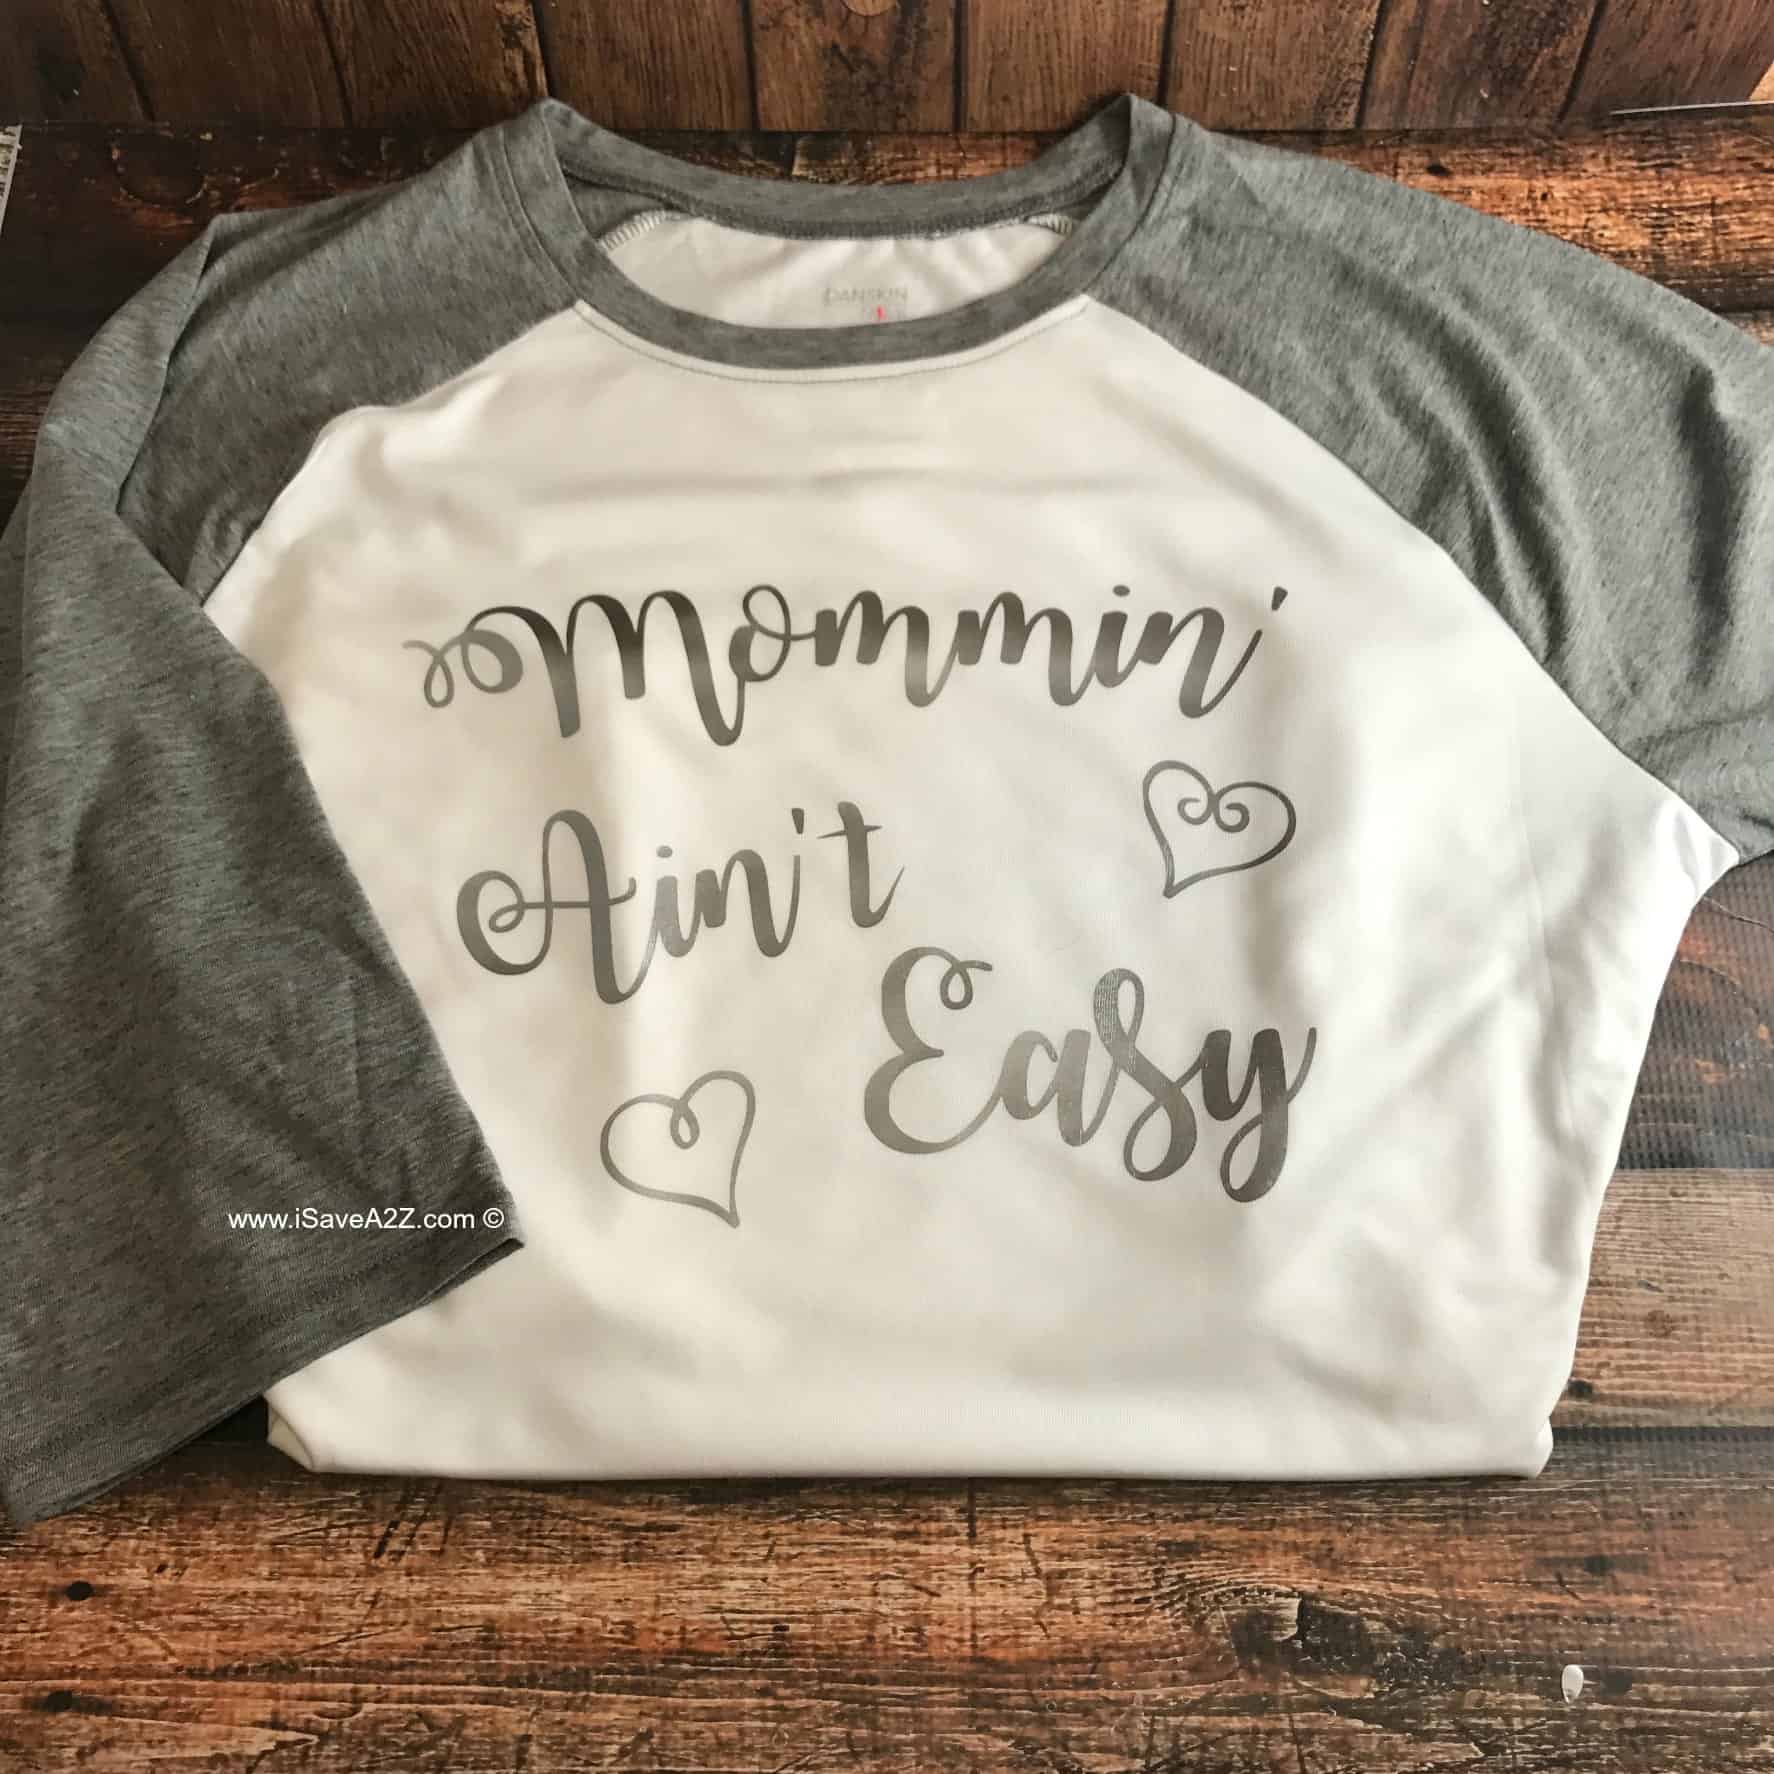
Here’s a shirt I crafted for myself:
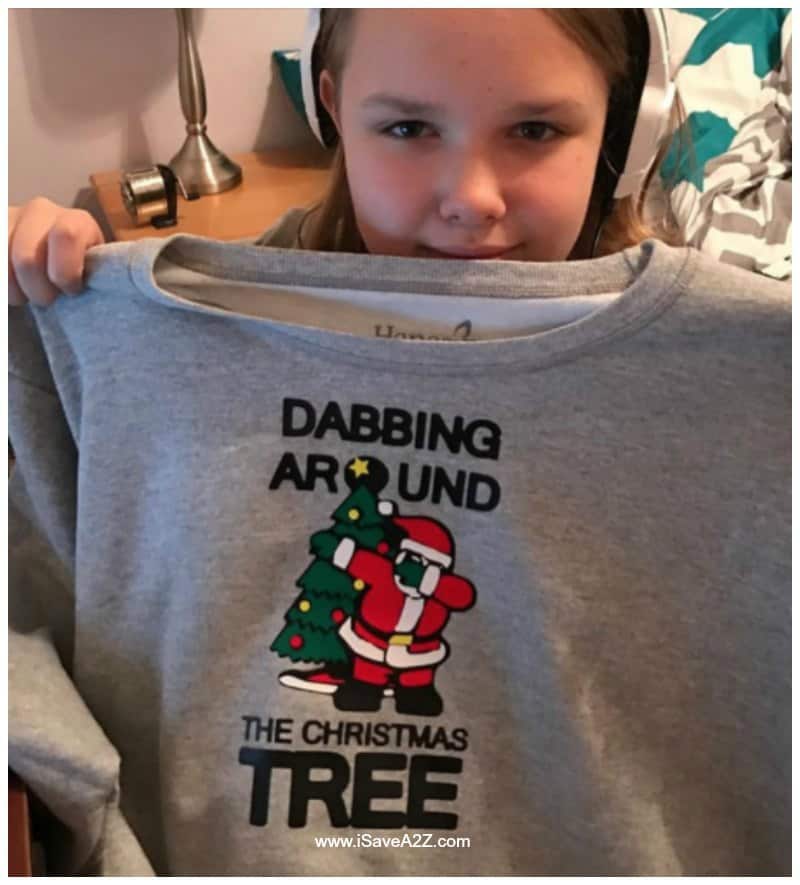
Also, if you want a quick design, try shopping on Etsy for some ready made designs just like I did with this Dabbing Around the Christmas Tree design I found on Etsy!
Stay tuned for more projects!!! I’m having a ball!!!