Raised Bed Garden Designs
Raised Bed Garden Designs
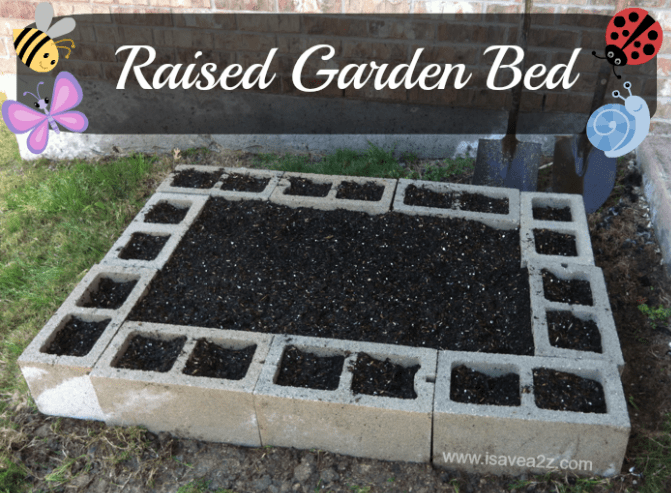
If you are looking for raised bed garden designs, look no further! This raised garden is one of the easiest plans you can do!
My daughter is eight years old and wanted a garden of her very own really bad. I’m not sure how dedicated she will be to this garden to I decided not to take a huge portion of my backyard for her new found love of gardening. Not yet anyway.
She recently outgrew her homemade tent bunk bed make from cinder blocks so I had no need for these anywhere else around the house. These are just what I needed for my garden planning project!!
I also want to include a few tips from long-time reader, Karen:
We use the ‘holes’ in the blocks as pots. We used them for invasive but well-loved plants like Mint and Lemon Balm.
Another tip, make your own soil with Mel Bartholomew’s Square Foot Gardening (2nd Edition) soil mix. It’s much cheaper and MUCH better.
Mel’s Mix is 1/3 Garden Compost, 1/3 peat moss, and 1/3 Vermiculite. (Buy the vermiculite in bulk. It’s WAY too expensive to buy small batches at the big retailers.

Here’s an update: Look at the little creature we found in our garden today! Wow! He’s not so little, is he? After much research, it turns out that this is a Moth Hawk caterpillar and it will devour your tomatoes within hours!
If you are looking for a non-chemical way to treat them, here are a few options: Fresh Garlic mixed with water will repel them. Dawn soap with water will coat the plants and create a glue they don’t like.
I was also told to just pick them off and get rid of them. Usually, there are only one or two but they are very hard to see. If you don’t mind using chemicals then I hear seven dust is the stuff to use. I am planning the no chemical route so I didn’t try this option.
Garden Supplies and Directions for any raised bed garden designs:
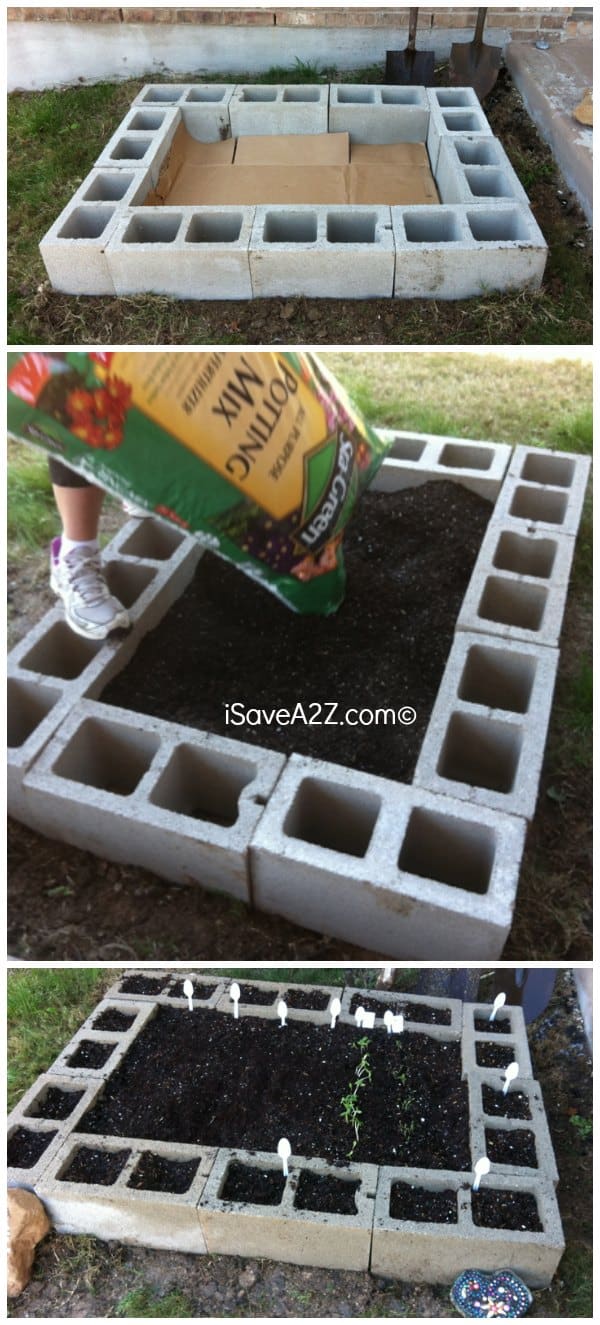
First, Level out the space you want to use. This is probably the hardest and most time-consuming part besides lifting the cinder blocks. Keep in mind when choosing a spot in your yard of what you actually want to grow.
Does it need full sun or part sun? Shade? Part shade? Knowing ahead of time what you want to grow will help you determine the amount of space you need too.
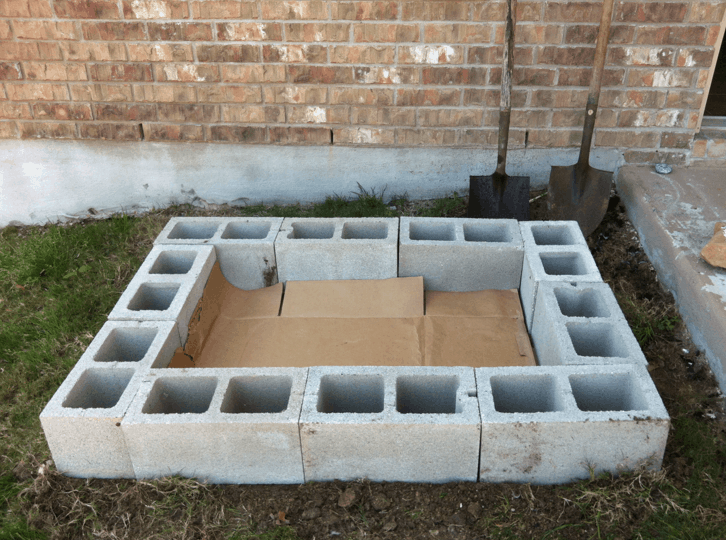
After your space and been chosen and leveled you want to lay out the cinder blocks with the holes facing up. This will kept the potting soil in the garden and give you extra space to plant something in between the cinder block holes too. If you plan to make a deeper garden than what we did you could also fill them with dirt (not potting soil) to make them sturdier too.
Before we adding the soil we laid cardboard boxes at the bottom of the garden so we wouldn’t get weeds or grass growing in our garden. I’ve also heard the cinder blocks have chemicals in them so we made sure to put the box flaps all the way up on the sides of the blocks too.
You could also lay down a weed barrier fabric if you didn’t want to do the boxes. The boxes where highly successful in keeping the weeds out of our garden though so I will definitely be doing this again!
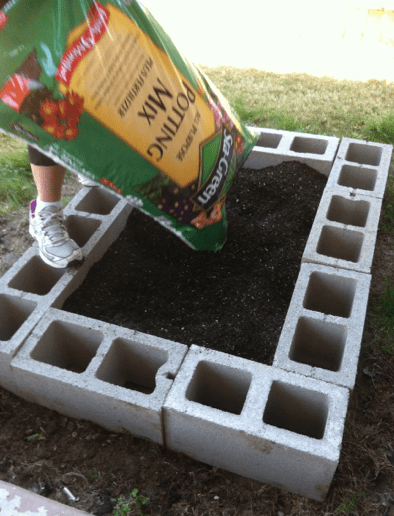
Next you can put down a layer of rocks or straw to help with the drainage if needed. We did not do this step in our garden.
Finally you are ready to add your soil! We used a potting mix type soil as recommended for starting a garden. My daughter has chosen to plant onions, cilantro, tomatoes, carrots and lots of flowers! She is beyond excited! I couldn’t be more happier with our easy DIY project!
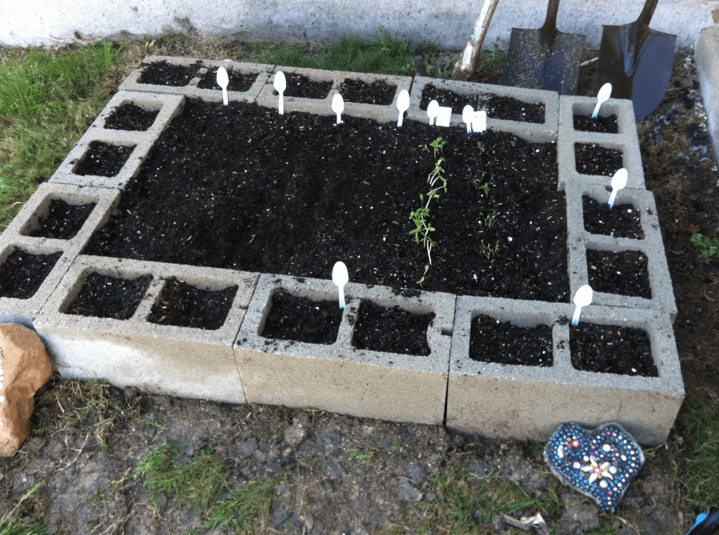
If you wanted to get really artsy you could paint the cinder blocks or even do a bit of mosaics on them before starting your garden too!
We started out used plastic spoons and a sharpie marker to write what we were growing but later ended up painted some beautiful rocks to display what is growing where! That’s it! How easy is that! She is so incredibly proud of her garden and she can’t wait to see the fruits of our labor.
I have to admit… out of all the gardens I’ve done this is the most simple of plans.
Be sure to check out our Planting Bulbs and Daisy Garden posts! I think you will like them!
One of our favorite gardening books is the All New Square Foot Gardening, Second Edition: The Revolutionary Way to Grow More In Less Space
Gardening Tip: I don’t think I could garden without the use of my Garden Bucket Caddy I purchase last year. It has been extremely helpful and I highly recommend it! I put my cell phone in one of the spaces so it doesn’t get dirty or wet.
UPDATE!
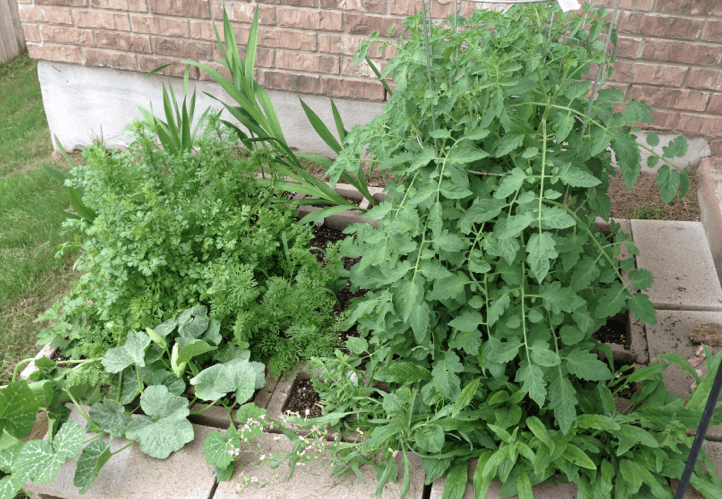
We are extremely pleased with our garden plans! We have not had to pick one weed so the box works nicely. We plan to more than triple our next garden! Here’s an updated photo to show our progress! Cilantro anyone?! 🙂
Check out one of my favorite books: All New Square Foot Gardening, Second Edition: The Revolutionary Way to Grow More In Less Space
Greenland Gardener 6-Inch Raised Bed Garden Kit (it’s plastic so there’s no rotting of wood!)
Look what’s new this year!!! I found an easy way to create a raised garden bed and cheap too: Smart Pots Big Bag Bed Fabric Raised Bed
Stay tuned for updates on our garden.
We have tons more Gardening tips from Daisy Gardens to Vegetable Gardens here!
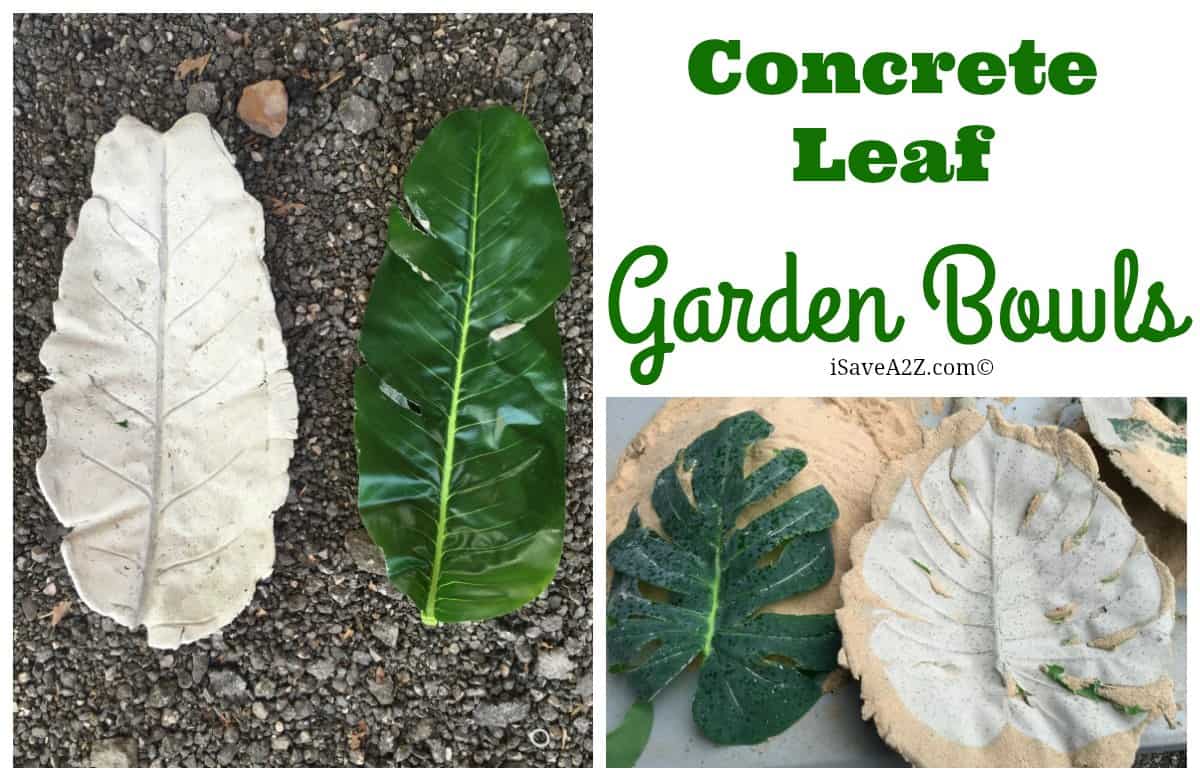
We just made the most beautiful DIY Concrete leaf garden bowl! Look!
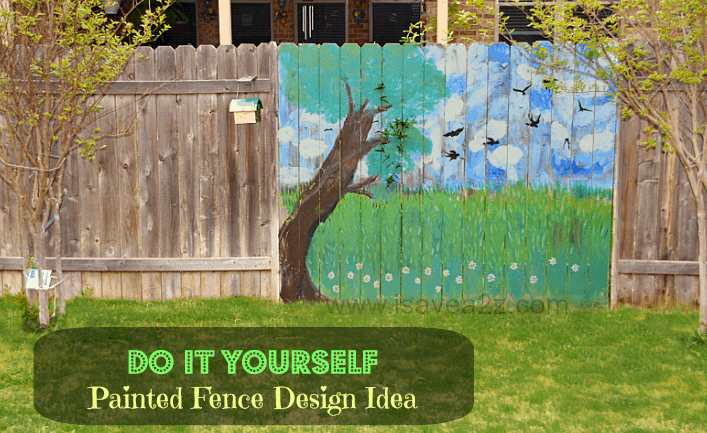
If you enjoyed this post, you may also get a kick out of our Painted Fence Ideas post here!
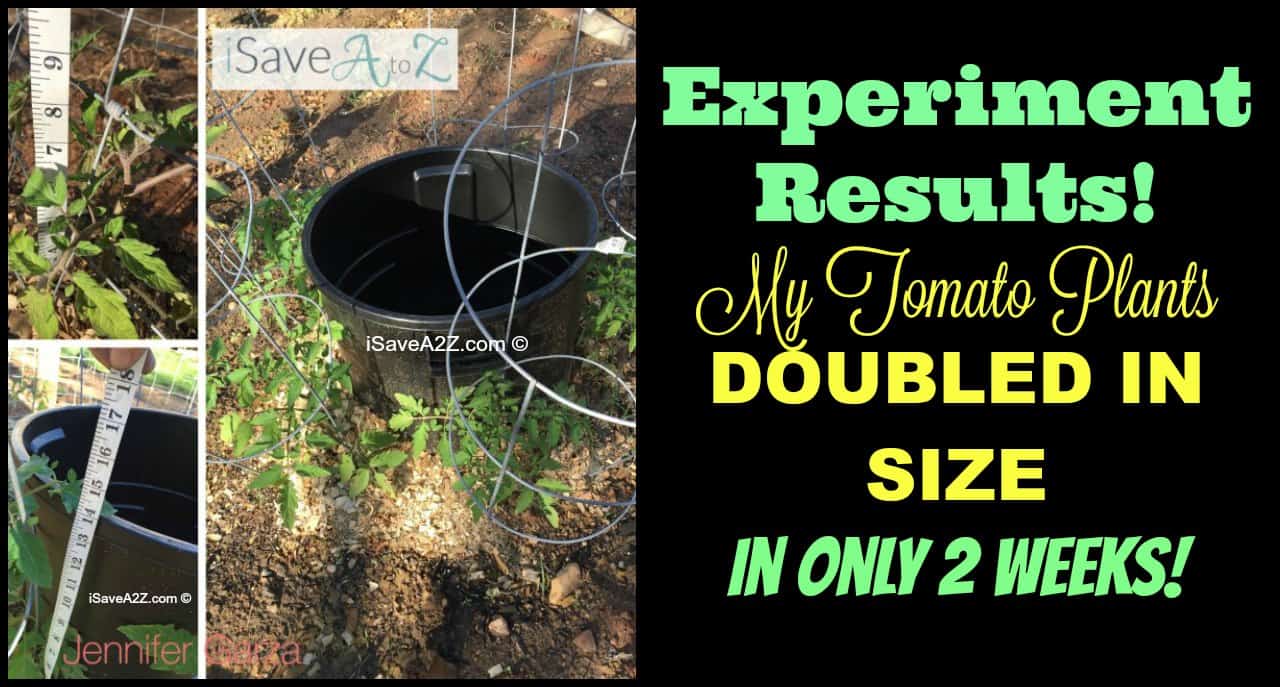
UPDATE! Check out our latest article! We found a hack for watering tomato plants that works amazingly well!
Be sure to look at some of the rocks we’ve painted and displayed around our garden too.

Update: I just had the sweetest neighbor move in close to me and guess what?!!! She loves gardening and “being green” just as much as I do!!!
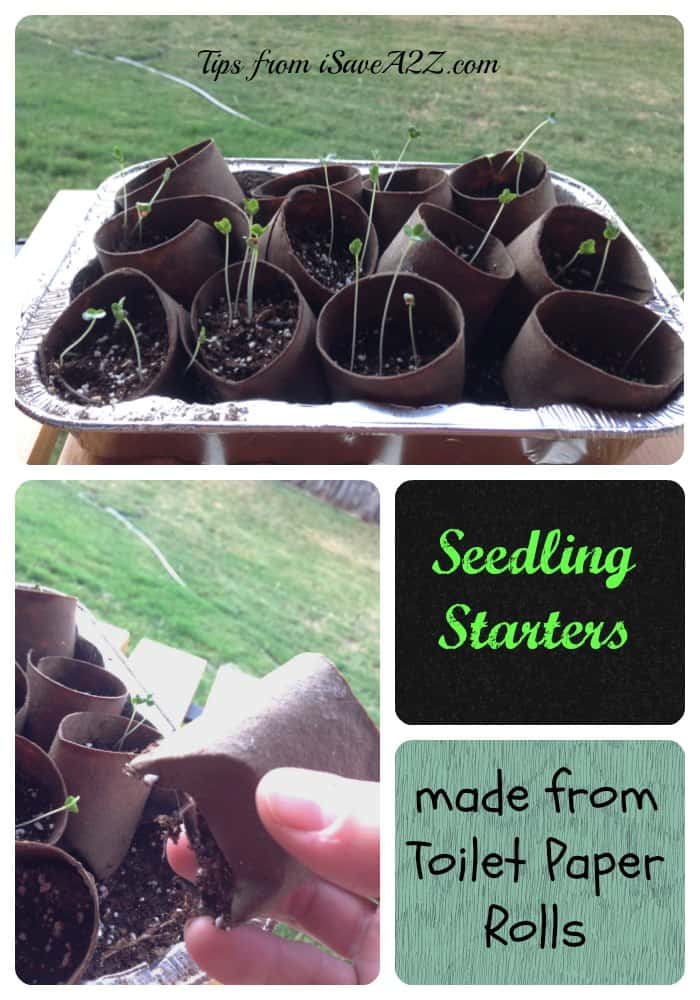
She wanted to give iSavers a gardening tip by recycling some items that we normally just throw away. She started her own seedlings using toilet paper rolls. How cute is that?!! You can plant them directly into your garden bed with the roll still on it too! LOOK:
If you’re putting together a raised bed garden and want a cute, practical way to label your plants, check out these DIY Herb Garden Plant Markers! They’re colorful, handmade, and super easy to create using sublimation printing. Andrea shares all the steps over on her blog at Savings Lifestyle. It’s a fun little side project that adds a personal touch to your garden space. Perfect for kids’ gardens too!
Enjoy!
Pin It Here:





wondering if the cardboard has to be replaced new each year? Love this whole idea!
I had it for two years and I did not have to dig it up and replace the cardboard. The weeds tried to get in from the sides but not the bottom. It seems as though once you lay it, it works for a long time. That was my experience anyway.
No you do not need to replace the cardboard. Also use newspaper in the areas that the cardboard doesn’t quite cover up!!
Whenever I start a new garden bed…I do the same thing….and tell others to use cardboard and newspapers. I’m always saving my newspapers, and seem to spot big boxes as needed. This summer a local store was breaking down a large display box, I asked..is that garbage?? Can I have it? The gentleman even broke it down flat for me….I easily folded it and slid it into my backseat!!!
A neighbor a few doors down….had framed a garden and was dreading digging up the ground….I said no no no….and I ran home got her some cardboard and newspapers….helped her lay it. I like to wet it down with the hose also….gets it to start biodegrading….then start layering in your soils!!! After I plant, I also add natural UN dyed wood chip mulch on top!!! Looks nice, Keeps weeding down and keeps the plant roots cool and moist….and NO MUD SPLATTERS as you water!!! 😀 The mulch will break down and compost into the soil….such a win win!!!
Wishing you a Bountiful Harvest!!!
what about rodents? will landscaping fabric and the cardboard/newspaper keep them from coming up through the bottom!
I’ve never had an issue.
Hi,
I see some comments are from 2013, so I apologize if this is such a late reply. But I have a question. I see that you said that the cinder blocks are harmful, or something of that sort. So did you line each cinder block hole sides with cardboard? I am looking to plant different types of lettus in each hole, so Iʻm a little worried the edges might touch it. Or would you recommend planting something other than lettus in each individual hole?
Thanks for your time!
I lined the whole middle part of the cinder block garden with cardboard boxes and I planted flowers in the holes. I’ve not had any problems doing it this way.
I saw your comment about using Sevin dust to get rid of caterpillars. I learned from an old gardener to dust the plants with a self rising flour to kill them. It rises inside them and kills them.
I had no idea! Thanks Terry! I’m gonna try it!
Ok.. Love the idea, and, happen to have a lot of cinder blocks as my neighbour recently tore out an old indoor fireplace, and I simply couldn’t let them go to the landfill..
Point of contention with the idea..
Cinder blocks are heavy.. and building even a small garden is a bit of a chore.. with all the lifting.Once in place, it’s permanent.. but it remains a chore.
Cinder blocks are not … cheap per se, but this project is AWESOME if you can find older / used bricks that don’t hit the landfill..(Again, being able to get even a couple of dozen bricks home requires a trailer and some lifting.. )..
Other than pointing out the obvious.. I think the idea is awesome.. and will be building a few of my cinder towers later today.. 🙂
Thanks for the idea.. Will send a pic or two when it’s done.
I would love to see a photo!
Just a couple of tips. Cardboard degrades in time and not a long time fix, shade cloth would last longer. My tomato plants were bombarded with the moth hawk caterpillars, I quickly hand picked those various eaters, throwing them on my dirt parking area where the birds were happily consuming them. Yes, put them out where the birds can eat them, thinking at the time, what a great exchange. I suggest never using chemicals in your garden, there are alternatives in your house that work just as well. I’ve been an organic farmer for years, refusing to ever using chemicals, and have done very well.
Happy gardening!!
Have you tried bug ‘tea’? Place hornworms in a sock or stocking leg. Place sock in watering can. Smoosh contents of sock. Add water. Let stand for an hour or two. Sprinkle on plants.
Besides deterring the caterpillars, the birds stay hungry enough to hunt the bugs you might miss.
Marvellous
Here’s a suggestion – rather than using a broken down cardboard box (which has cracks between flaps that weeds and grass can grow up through), why not go to Sam’s or Costco or one of those big box stores and ask them if they have any pallet cardboard dividers that are usually between the layers of each stack of goods in the store? I think they just crush those and recycle them anyway, but they are one solid piece of cardboard. Lay it down first, THEN pay the bricks down, with the outer edges of the bricks INSIDE the edge of the cardboard, so that the entire brick lays on top. The cardboard will allow water through, but won’t allow weeds to grow UP through the cardboard.
We have a super hard time with long grass runners growing through garden bed fabric around here and boy are they persistent.
lay the bricks, not pay the bricks. Where’s my glasses??
I live in a duplex with no yard. Instead we have a cement “patio” I would like to garden with my littles, would this work if placed the blocks on top of the cement? Should I maybe make it higher for a deeper garden?
Hmmm… this is a tough one. You need to have the excess water drain and I don’t think a cement patio would allow for that. Anyone else have any ideas for cement patios? I’m thinking of container gardening for you. This way you won’t have the drainage issues.
The cinder blocks will have cracks where they abut. These cracks should be plenty to allow for drainage.
Yep, definitely a container garden! They can also be so beautiful that no city-folks will complain!
How about some flowerpots, the long rectangle ones. Or even regular flowerpots.i have planted tomatoes in 5 gallon buckets, drilling holes about an inch from the bottom. They did really well.
put a sleeper raised bed{ 2 high on their edges} and laid shade cloth on the concrete patio and up the side of the sleepers. worked well, just topped up the soil after crop had finished. have grown tomatoes, capsicum, chillies, cucumbers and zucchinis over the last few years. out in the full sun the concrete may get too hot, so I put them in semi shaded areas.
there shouldn’t be any problem with drainage on the concrete–it won’t drain THRU the concrete but run off around and under the concrete blocks and down the slab to wherever rain runs…i’d use the weed cloth, tho, to help hold the soil rather than the cardboard, and you sure aren’t going to have to worry about weeds and grass!! it is the same principle of using pots,,the water drains out the bottom of the pot and down the slab. hope this helps..i live upstairs, and landlord wants a clean walkway. not sure that he would let me grow anything. need to ask him, i suppose.
I use the big plastic clear bins as big pots instead of a raised garden. Just drill some holes on the bottom to allow water to drain out. Works well and just saw something about using the fibers inside of a diaper to mix with the soil so that it holds more water.
My yard was full of trees..can’t even grow grass. I have had raised beds on my asphalt driveway for 14 years. I’ve had a lot of luck. I used landscape fabric under the dirt to help keep the dirt from washing away. The trees are gone and I’m worried now what my drive will look like once we move the beds to the yard. I’m sure cement would stain from the dark dirt.
I would think the cement will clean up fine!!! Might need a little “Blue” Dawn dish soap and broom….if dawn will wash oil off a duck….it should clean dirt off a driveway!!! If not….I hear Coke a Cola works well on car fluid stained drives!!!
Last year was a first for me planting vegetables. Did not have a garden, so I did my garden in planters! Just several pots with the plants I wanted, from beans to tomatoes to zucchini. Also lettuce and cucumbers. We are doing a raised bed this year, but I am still using my pots for my tomatoes!
For years, out here in the sticks of Wyoming people have recycled old tires, stacked to whatever depth you need to grow tomatoes, potatoes and anything that has a deep root system. Nobody I’ve talked with has ever said anything about contamination from the rubber. It works great for hills of potatoes. If you don;t like the black of the tires you can spray paint them with different colors to liven up the look!
I saw a fellow and his wife who stacked the tires to a depth of 5 feet or so, filling the interior space as they went, then drilling holes into the stack all around the tires and then planted tomatoes and even strawberries. The result was amazing!
I think you could even stack the same sizes of old bicycle tires for a bit more interior room.Just fill the inside with your favorite potting soil and there you go. One could even stack several tires high and, if you have a drainage problem or need extra drainage for some reason, you could put down a layer of rocks to your desired depth, add sand and then add the potting soil or whatever you want to use for your soil. I’ve even seen wonderful tomatoes and hills of potatoes come from just the soil from the yard or, if you live in the country and have access to hillsides that have that wonderful, loamy black dirt that sometimes one is lucky enough to find, bring home full garbage cans or barrels of the dirt and use it to plant your garden.
I did overlap the boxes and I did not have any issues with grass growing up in it.
where do you get the manual tiller? I really like that
You don’t need a tiller, just cut the grass short…and lay cardboard and newspaper down….then add your dirt….It’s called Lasagna Gardening!!!
You can do a search on it….and find videos to watch, books to order, or websites to read!!!
Just beware of pesky Trees!!! I have a tree in my yard that keeps sending roots over to my garden beds…..likes the soil I guess 🙂
I used the weed fabric and it caused fungus and mold to the roots and everything died after growing great till the roots hit the fabric.
I myself will just let the bed drain naturally from now on.
Another free and easy solution if you don’t have boxes laying around is using old newspapers if you overlap pages and wet them prior to straw or rocks or dirt they keep weeds out for a minimum of 2 years and gradually decomposes providing compost for your plants as well…….also for the raised bed materials if you don’t have cinder blocks go to your local walmart and they will give you their used plain pallets place them down and put dirt inside and you have a raised bed with already made rows
I love you website I have been looking for an idea about raised bed gardening now I finally found you thanks so much
We are planning one of these for next year. I was wondering if you have trouble when you have a big rain with water pooling in garden or blocks. And if you do, what steps you take to control it.
Glenda,
I have the same concern with torrential downpours here in Florida. Did you ever get a reply or learn a solution?
I was so thrilled to find your site and the raised cinder block beds. My husband and I spent a week digging out our lovely 4″ think cedar plank raised beds, as they were filled with roots, massive roots from last years crop. Then we spent every night in an Epson Salt bath and then slathering each others backs and arms with Tiger Balm. Talk about back breaking work! I’ve sworn off those beds for the future. They will now house berry bushes that will grow continuously and don’t ever have to come out.
We will be putting another garden, in another location, next year and all of our beds will be made out of cinder blocks. The cardboard in the bottom of the bed is a great idea. I wonder if it would keep out the Mountain Misery that we had in ours. It came up from below the bed. We live in the Sierra’s and that stuff in invasive. We also have a problem with moles, voles and gophers, so we always lay down hardware cloth under our beds. No more problems with those critters.
Now instead of digging out, we can just remove the cinder blocks at the end of the season and scoop the dirt into our sifter and yard cart to mix with steer manure and replant. Color me happy!
We have also placed a row of cinder blocks around our chicken coop, and planted grape vines in several of the holes. They will grow up and over the coop providing an extra treat for the chicken and shade in our hot summers. In the other holes, I’ve planted kale and other greens that are good for the chickens. .
Thank you again for this post, and your site. We will be forever grateful! 🙂
That’s AWESOME Patty! You are very welcome! I wished I could see photos of all of your work. Sounds amazing!
I just found you as well, Jennifer. Thought I would mention that I also have cinder blocks laid out like this outside my chicken coop. I have it separated down the middle and use it to compost the chicken manure. One section is for the older litter that is ready to be put on the garden and of course the other is for the newer. Just made it this season and am liking the convenience of a close spot to dump the manure.
I am doing a cinder block raised bed around my patio extension. This is so my dogs can stop trying to dig up my garden, and my 2 sons can help plant. I have three areas mapped for them. 2 on the side of the house, one in the back.
Can you paint the blocks so they don’t look so foundation-like? If so, what kind of paint should I use? I wanted to paint them dark and stencil on the outside.
THEY DO MAKE A PAINT JUST FOR CEMENT BLOCKS. I THINK HOME DEPOT CARRIES IT.
I am building my first raised garden. I’m also using center blocks. My question is do you think it’s ok to lay plastic down on the ground instead of boxes ect. ? To keep weeds and stuff out?
Thanks!
I wouldn’t use plastic because the water needs to drain. I would use a weed blocker or boxes.
I have used several sheets of newspaper randomly overlapping the edges with success when planting marigolds. I used an old kitchen knife to cut an “x” through the newspaper to place each plant, folded the flaps from the “x” back around each plant and then mulched. No weeds, great drainage, and no cost! Perennials can not reseed, but it beats weeding.
You can use newspaper.
I have been using this method for years for an herb garden. I live in the high mountain of Colorado so our summer is very short. Mine is located on the back corner of the house where the sun shines the most. I love being able to put extra herbs in the holes. The only problem I have is the dogs love to run across it when they are taking a short cut! I have put wire over the top in the past, and will probably do so again this year. I tried putting in long sticks (sticking up) all through the garden, but they just took them out to chew on! 🙂
If you put a piece of rebar in each of the corners in the hole letting it stick up 2 to 3 feet, then wrap it in wire, chicken or other. This should keep the dogs or cats out of the bed. We have deer that love to eat our plants so we wire cage (cover) everything. Best of Luck.
Where are the mothballs and water placed to keep snakes away
So happy I found your page. I discovered The Garden Glove via Pinterest, which I love. Your cinder block raised bed is a great idea. I’ve been wanting to do raised beds for a while, but couldn’t afford the ones that you buy to put together. Can’t believe how expensive they are! I kept trying to think of some kind of stones or whatever that would work, and the cinder blocks hit the nail on the head! I’m older and have difficulty going to the ground these days, so need higher beds so I can sit while working. And the cinder blocks can be piled or expanded or the placement shaped however I need in a given area. A real plus is that I can spray paint colors, or even paint flowers on the outside of the blocks. I paint on regular rocks and would love to do a nice border on the blocks. I could probably smooth out the cinder grain with a gesso or something, and spray a sealant over the finished painting. I’m very excited about the idea now! Thanks for sharing.
Maybe a patchwork design like a quilt with designs on some blocks since you are talented in painting.
May consider putting in a “shelf” to require less soil.
Also, the Square Foot Gardening book shows one up on saw horses so you can easily sit to garden. Wheelchair friendly too!!
Happy Gardening; it is good for the soul!!
Aren’t those worms ugly? They seem to show up out of nowhere and I know from experience that they will literally devour and destroy your tomato plants overnight! I have had to resort to Sevin dust a time or two, but the best thing you can do is check very closely on pretty much a daily basis and pull the repulsive things off and squash them. You will notice that they sometimes have eggs all along their backs and I used to think that these were their own means of reproduction. Reading on the subject I have found that these are actually the eggs of a specific wasp that feeds on this particular worm. The eggs will mature into wasps that I believe are not the stinging kind. They kill the host worm by devouring it as they grow. Since they have been such an aggravation to me in the past, I have done a good bit of research on them. They are also called Tomato Horn Worms!
Yes! They are ugly! Wow! You have done your research!
you can safely kill garden pests by dusting plants and dirt with self-rising flour…they eat it and explode…seriously, it works…
Good to know! Thanks Kelli!
I found you on Pinterest. I am getting ready to put two of these in my backyard. I was wondering how much potting soil you used? Thank you!
For this small one I did I think it took about 3 bags of top soil
Joyce thanks for asking and Jennifer thanks for the answer. My daughter and I starts some seeds inside but we are ready to transplant. This is a great idea! Thanks for sharing!
Do you remember if the bags were 32 quart or 64 quart?
They were the bigger ones so I’m gonna go with 64 quart.
Companion plants for tomatoes is marigolds. I never had a pesky bugs in any of my tomatoes.
yes the marigolds work great!
I have done this for several years, one of my beds has an obelisk for cucumber vines. I lined mine with layers of newspaper, works just as well as cardboard. I also made mine two blocks high, that way I can sit on the side to do the planting, weeding, picking … my knees preclude my kneeling.
This is a great idea but be careful with children around the cinder blocks. I have had snakes find them very nice homes since the blocks tend to stay cool. I has to get rid of mine when I found a best of copperheads.
OH geez! Oh scary! Thanks for the warning. We fill the holes with more dirt and create individual spaces for flowers.
mothballs and salt will keep the snakes away!
Oh that’s really good to know! Thanks!!!
I noticed when you put the cardboard down you went up the sides a little, this is great because it should help the dirt to NOT flow out between those blocks. Love this
Very nice! I see extra blocks in the later picture. Do you need to go around the edges twice to keep it stable? Thanks!
Hi, thank you for the great and cheap idea! I found you on Pinterest and I see this is an older page but I hope you can answer a question. It looks like you added more cinder blocks around the edges in the picture showing your grown herbs and veggies. Is that correct? Do the blocks become uneven over time? Any other updated advice? Thanks!
Sorry for double post, I was looking in the wrong place! Please delete one! Thanks!
Great question! No, the cinder blocks do not become uneven or unstable. We added more only because we had some left over from another project just sitting around. We decided to face them down so that we would have a place to kneel down when we harvested. It was also a good place to step so we weren’t stepping in the mud around it. Honestly, I kind of made a mistake when I positioned the garden bed right there because it’s in a corner of my house where the roof top water spout comes down. I need to put up some gutters so that the huge water down pour doesn’t create a mud pile for me when it rains. I plan to expand this garden in the spring and use those same cinder blocks to make it even bigger with one row around it and slightly away from the house. I hope that helps you. We had so much fun with this project! The box at the bottom of the dirt was amazing in blocking the weeds. Jen
Thanks! I am very excited about gardening this way once this LONG winter ends!
Thanks for this. I have given up on gardening because I am gone a lot and can’t keep up a space in the ground – it is overrun with weeds by the end of the year. This is a perfect solution for fall gardening.
On a different note, this is kind of eerie because these pictures could be my house – everything from the deck on the right to the wood fence on the left, the brick and the large space for the foundation at the bottom. I now have a wooden flower box built in next to the patio but it hasn’t always been there. Crazy.
I have been wanting to do some kind of a raised bed garden, and love the idea of using the cinderblocks for the walls, with the separate holes for planting containers. I’ve got the perfect spot for that. Thanks for the tutorial.
You’re welcome! Good luck!
Thanks so much for the tip about using cardboard boxes. We were getting ready to cut chicken wire to keep out the moles, but this sounds like it might do the trick- and it looks like it kept out the weeds. YAY!
I’m so excited I found your blog!
You’re welcome! I’m glad you found us!! Welcome!
Thank you so much for this incredible idea! I was about to spend $150 for a wood above-ground garden…which was just wood boards. Instead, the cement blocks will last a lifetime and the cost is MUCH less!
You’re welcome! Glad I could save you some money! We love our garden!
Thank you for this easy idea. I am ill and don’t have a lot of help but, still am determine to be independent and do the things I love. This is something that I can do.… With the help of the boys at Home Depot 🙂
I love your positive thinking Alicia! I wish you well soon!
Thank you. This will probably be my last garden since I am so ill. But what a great one because of you.
Oh Brandi, I hope and pray you get better real soon. I’m very happy to have made you smile during your difficult time. Hugs to you my friend.
I am going to try this !! I am so excited!!
I am going to try this type of raised bed this year.I have some concrete blocks and also some 2×6 wood to build a box. I have been doing regular flat land gardening for many years but last year I found out that my main problem was getting the soil to drain. Not enough air getting to the roots = small plants and low productivity. So this year I will try raised beds. I will be experimenting with several beds but most will have a mixture of compost, vermiculite, perlite, cow manure in the bag so I hope to not have the weed probem. I will also mix a small amount of garden soil out a the bag. Part of the garden I will mix some bone meal, blood meal, and several other amendments to. I am tired of the cold and want to start soon. I have many tomatos ready to go as I started those from seed in November. We will see.
I love reading your comment! I can’t wait for it to get warm too! I’ve had a draining problem before and found that rocks under the layers of soil help but I love the raised garden beds. I prefer them now. We didn’t have any problems with weeds when we put down boxes at the bottom. It worked perfectly! When I moved my garden bed last year I moved all the soil and the box was completely gone. The soil was nice and rich. All the grass and weeds were gone too. Try it!
I am so happy I found you on Pinterest. I have been wanting to try a
raised garden bed but everything seemed so difficult to get started. Your method and system seems to be the Perfect Solution to what I
have been looking for.Thanks for sharing and giving and showing details on how to do it. It seems to be inexpensive and I can’t wait to
try it. THANKS AGAIN FOR SHARING–
Glad you found us Barbara! We are frugal by nature and we love easy projects! Welcome to our blog!
This seems like a perfect project for my kids. Cant wait!
Thank you so much for this great tutorial!! I cannot wait for the warmer weather to sprout so I can make one of my very own! I have included this on my blog at http://www.doomestic.com for useful sites, thanks again!!
Thanks for sharing Tiffany! That’s awesome!
This is genius! I am planning my garden for the summer and was dreading having to ask my dh to construct one. We could totally do this. tks!
Glad you liked it! Can’t wait to hear about your garden.
We have this same concept in our backyard and the kids do great with managing it and the little cubbies. We fill them with marigolds and herbs, favorite it mint because it keeps it contained and from spreading throughout the garden. We have quite a few gardening with Kids posts that your readers might find helpful. Here’s the link. http://theeducatorsspinonit.blogspot.com/search/label/Kids%20in%20the%20Garden
Awesome Kim! The garden you have looks amazing! I know where to go for more inspirations!
Thanks Jennifer, it’s actually by coblogger Amanda’s gardens mostly featured on our site, I have learned so much from her. Plus I love how she connect gardening with her kids, they are amazing vegetables eaters I think because of it. Can’t wait to see how your garden turns on this year, it’s so much fun with the kids get involved too.
Oh I will have to check her out! Thanks!
Love it!!! I am so doing this. We have been wondering what to do with our raised beds and this is the answer. thanks
So glad you like it! It was a really easy project!
Great idea. I used cardboard on bottom, then a layer of shredded mulch, then soil… then herbs..and more mulch. Better water retention on herbs.
Awesome! Thanks for sharing Dana!! Good idea on the mulch! We use shredded newspapers on the top of our garden too for mulch. My kids love tearing the paper to shreds…
Another fantastic idea! Sure hope I can pull off some gardening in a few months. I miss having those home grown tomatoes Yum!